HenryMod
⚪ Last updated 2021Preview
🔍 Analysis
- 🏆 #31 of 128 Tweaks mods in this game by downloads
📋 About This Mod
Overview This tutorial will go over custom character creation for Risk of Rain 2. It assumes a basic understanding of Unity and C# at the very least. If you don't have that and get stuck, look up tutorials! I can't teach you everything here. Disclaimer: I've never written tutorials before and am a horrible teacher so things may not be explained properly. Getting Started Creating a character is a daunting task. Between modeling, animation, coding, skill icons, sounds, VFX and more there's a whole lot that goes into it. Don't expect it to be an easy process. The first step would be cloning this repo and opening up HenryMod.sln in Visual Studio . The recommended starting point is skill creation. This tutorial is a good place to start, HOWEVER- step 1 goes over adding the skill to a body, which is already streamlined with Henry. I recommend starting from step 2 and working with his existing skills to make what you want. Creating skills is a pretty specific process that involves a lot of hard coding that greatly differs depending on what you want the skill to do, so there's not a whole lot that can be explained here. 3 basic types of attacks, OverlapAttacks (melee), BulletAttacks (hitscan) and Projectiles have been included as examples. Once you have skills down, then it's time to move on to creating assets. Of course you can always start with the assets if that's what you want. Model Import The software generally used to create and animate models is Blender - even Hopoo himself uses it. There's lots of tutorials out there so Blender is the one I recommend. However if you're comfortable with something else feel free to use that. When creating a character model, it's important to note due to reasons explained below that you're limited to having one material per mesh. There is, however, no limit to the amount of meshes you can have on your model. When importing your character model into Unity, it's important to get the scaling right so things like teleporter/on fire particles and item displays will all be scaled properly. The recommended method for this is exporting as FBX with these import/export settings: Setting up your character prefab in Unity You're gonna want Unity version 2019.4.26f1, the one Risk of Rain 2 currently uses. Download here Once you have this, if you haven't already, grab Henry's Unity project from the repo. This is recommended over creating a new one so that you can use Henry as a reference as well as add several scripts I've included to make things easier. Once that's done, follow these steps: Import your model. Drag it into the scene, right click it in the hierarchy and click Unpack Prefab . Then rename the GameObject to "mdlMyCharacterName", replacing MyCharacterName with your character's name of course. Remember the name you set here. Add an Animator . I highly recommend copying Henry's animator and pasting your own animations in. Add a ChildLocator component to your object. Add a empty GameObject as a child of your object. Call this "MainHurtbox" and add a Capsule Collider . Scale it to fit your character and make sure the pivot of the object is set around the center of your character. This determines the corePosition , where enemies will aim at and where effects like Berzerker's Pauldron will show up. In your ChildLocator , create a new entry called "MainHurtbox" and drag your hurtbox object into it. Once you've done this the code will handle the rest. Create more entries in your ChildLocator for every mesh you have in your model and drag those in where necessary. The names don't matter because you'll fill in that part in the code. Drag your GameObject into the Project window to create a new prefab Once again, drag it into the Project window to create another prefab, and when prompted, make a Prefab Variant . Then change the name of this to "MyCharacterNameDisplay", using the same name MyCharacterName from before. This will be your display prefab used in the lobby. Here we usually the Animator to a new one that just plays the lobby animation. Once this is all done, open the AssetBundle Browser and create a new AssetBundle (If you don't have the AssetBundle Browser window, go to Windows > Packages and there you can install it). Drag whatever assets you're using into there and build it. I like to have everything I need in a single folder and just drag that to keep things simple. Put the AssetBundle you've just created into your C# project. In visual studio, find the file in the Solution Explorer, right click it and hit Properties. Set Build Action to Embedded Resource. 10-1. Note: Yes, there is a better way to load assetbundles with your project, and I recommend looking into that when you can, especially if your assetbundle starts to get big, but for now, the embedded way is simpler for tutorial purposes. If this was done right, you should be able to navigate to where you built the AssetBundle and see a game ready bundle. Next step is hooking it all up in your code. Setting up your character prefab in code Assuming you've cloned Henry for this one, and have a basic understanding of how to navigate a C# project. Before you start, there's a few components that you're gonna be working with that it's important to understand. CharacterBody CharacterBody is the main component that handles most things relating to a character. This handles things like base stats, crosshairs, item interactions, etc. There's way too many things for me to go over so it's best to learn about this through experience. Henry's code takes care of all of the setup for this when creating your own body so don't stress over it too much. HealthComponent HealthComponent is pretty self-explanatory. It keeps track of character health and handles all instances of damage being dealt. When creating on-hit effects and such this is where you'll generally be hooking. CharacterModel CharacterModel is the component attached to every character model. It uses something called 'baseRendererInfos' to handle things like overlays and skins. A RendererInfo consists of mainly a renderer (MeshRenderer, SkinnedMeshRenderer, etc. all work) and a defaultMaterial . The ignoreOverlays field (self-explanatory what this does) should be set to false if you encounter issues like weird shield outlines. There is a mainRenderer field as well and in all honesty I haven't looked into what it's used for. ChildLocator A simple component that's used to easily reference child objects. This is useful for item displays, particle effects, muzzle flashes, and more. I make use of this component a lot to cleanly create characters. InputBankTest The InputBank is used to cache inputs from players as well as fake inputs from AI. You shouldn't need to use this much aside from a few skill interactions, like primary attack combos. There's plenty more to go over but these are the main ones you need to know. Reading through the game code with dnSpy always helps. Now it's time to move on to Henry's code. Step 1 - Initial Setup This step is very important in order to avoid conflicts with other mods. The first thing you wanna do is go through and change the name of the character to your own. Open up HenryPlugin.cs Rename the HenryMod namespace to a name of you're choosing. As well, rename the class HenryPlugin . In the Solution Explorer, go through and rename every instance of Henry to something else. If you haven't already, in Assets.cs , make sure you change the assetbundleName and csProjName as fits your renamed assetbundle and csproj. Back to your renamed HenryPlugin.cs , navigate to this section: Standard naming convention is com.AuthorName.YourModName so go ahead and fill in the fields accordingly. For the version, it's good practice to follow Semantic Versioning . This isn't enforced but you'll probably be made fun of if you don't follow it. Now after this, open up Tokens.cs Inside this class all our name tokens are stored for organization. Change any of these to your character and skill names and make sure to use
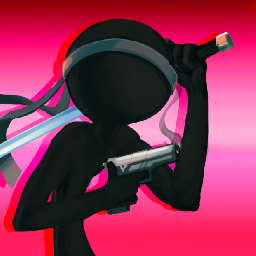
Adds Henry, a melee/ranged hybrid who uses a wide arsenal of weaponry. originally made by Rob, none of this is mine just minor numerical changes to balance stinger bomb and melee
📊 Mod Details
- Game
- Thunderstore Mods
- Author
- DidacticAscended
- Version
- 1.0.0
- Downloads
- 271
- Endorsements
- 0
- Category
- Tweaks
- Created
- 3/6/2021
- Updated
- 3/6/2021
- Tags
- Tweaks
🔧 How to Install Thunderstore Mods
Use r2modman/Thunderstore Mod Manager. Or manual: install BepInEx, drop mods into plugins folder.
📖 Full step-by-step install guide for Thunderstore →
Visit the official mod page for specific installation instructions for this mod.
🎮 Need cheat codes or console commands? Check ur gaming wiki for Thunderstore commands, item IDs, and more.
Keep browsing — more Thunderstore mods await